Labeling Multi-ROIs
You can use the tools available on the ROI Painter and ROI Tools panels to quickly and easily label voxels that correspond to the multiple classes of a multi-ROI, or to edit a multi-ROI.
You can use the tools available on the ROI Painter panel to manually label the voxels of each class in a multi-ROI (see ROI Painter).
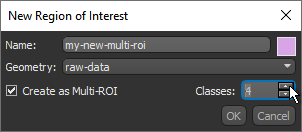
- Create a new multi-ROI, if required (see Creating New Multi-ROIs).
Note You can specify the number of classes required in the New Region of Interest dialog, shown below.
- Select the multi-ROI in the Data Properties and Settings panel.
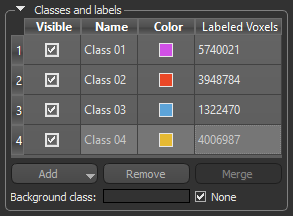
- Assign a name and color to each row in the Classes and scalar information box, recommended.

Note You can additional classes to the multi-ROI at any time. Click the Add button and then do one of the following:
- Choose Add Class in the drop-down menu to add a single class to the multi-ROI.
- Choose Add Multiple Classes in the drop-down menu then select the required number of classes in the Add Classes dialog, as shown below.
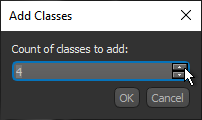
The requested number of classes are added to the multi-ROI.
- Designate one of the classes as the background, optional (see Setting a Class as the Background).
- Change the zoom factor and position, as well as adjust window leveling to facilitate labeling (see Using the Manipulate Tools and Window Leveling).
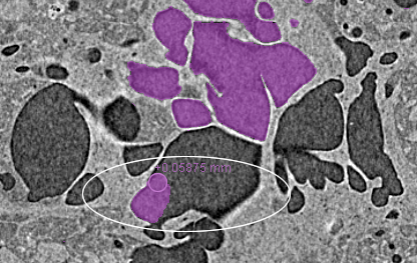
- Select a class in the Classes and scalar information box and then label the voxels corresponding to that class.
For example, you may need to label voxels that correspond to a specific material type, phase, or to an anatomical structure.
Note You can use the tools available on the ROI Painter and ROI Tools panels to label the multi-ROI (see ROI Painter and ROI Tools). You can also define an intensity domain to facilitate segmentation tasks (see Defining Intensity Ranges).
- Label voxels that correspond to the other classes included in the multi-ROI, as required.
Note The number of labeled voxels that correspond to each class is indicated in the Labeled Voxels column and is updated dynamically while you work.
- Save the multi-ROI, if required (see Exporting Objects).
If this option is enabled, labeled voxels that are removed from any class will be added automatically to the set background class.
- Name the class you intend to set as the background, recommended.
- Drag the class you intend to set as the background to the Background class box and drop it when the "+" appears with your cursor, as shown below.
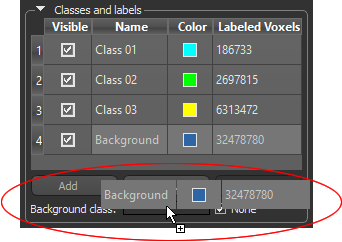
The name and associated color of the class appear in the Background class box.
Note If required, you can change the set background class by dragging another class to the Background class box.
Note Check the None option to disable the background.
You can add or remove labeled voxels from any selected class with the tools available on the ROI Painter and ROI Tools panels (see ROI Painter and ROI Tools). You should note the following whenever you edit the classes of a multi-ROI:
-
You can define an intensity domain to facilitate editing tasks (see Defining Intensity Ranges).
-
Labeled voxels cannot intersect. For example, if you are labeling voxels as 'Class 1' and paint over labeled voxels of another class, then those voxels will be automatically labeled as 'Class 1'.
-
When a single class of multi-ROI is selected and you are working in 'Remove' mode, only voxels within the selected class will be removed. All other labels will remain as is.
-
If no class is selected, all voxels will be removed when you are working in 'Remove' mode.
-
You can add or remove clipped regions from a selected class (Adding and Removing Clipped Regions).
-
You can edit labels in 'Two-color' mode, which limits painting to only the labeled voxels belonging to the selected classes (see Painting in Single and Two-Color Modes). For example, in cases in which a feature of interest was mislabeled as belonging to another class.
-
Additional options are available in the Classes pop-up menu to label all non-intersected voxels, clear classes, import the labels of a region of interest, and other operations (see Classes and Scalar Information Pop-Up Menu).
